

Watch: managing your team
Prefer to watch? This short video walks through inviting members and setting each person’s access.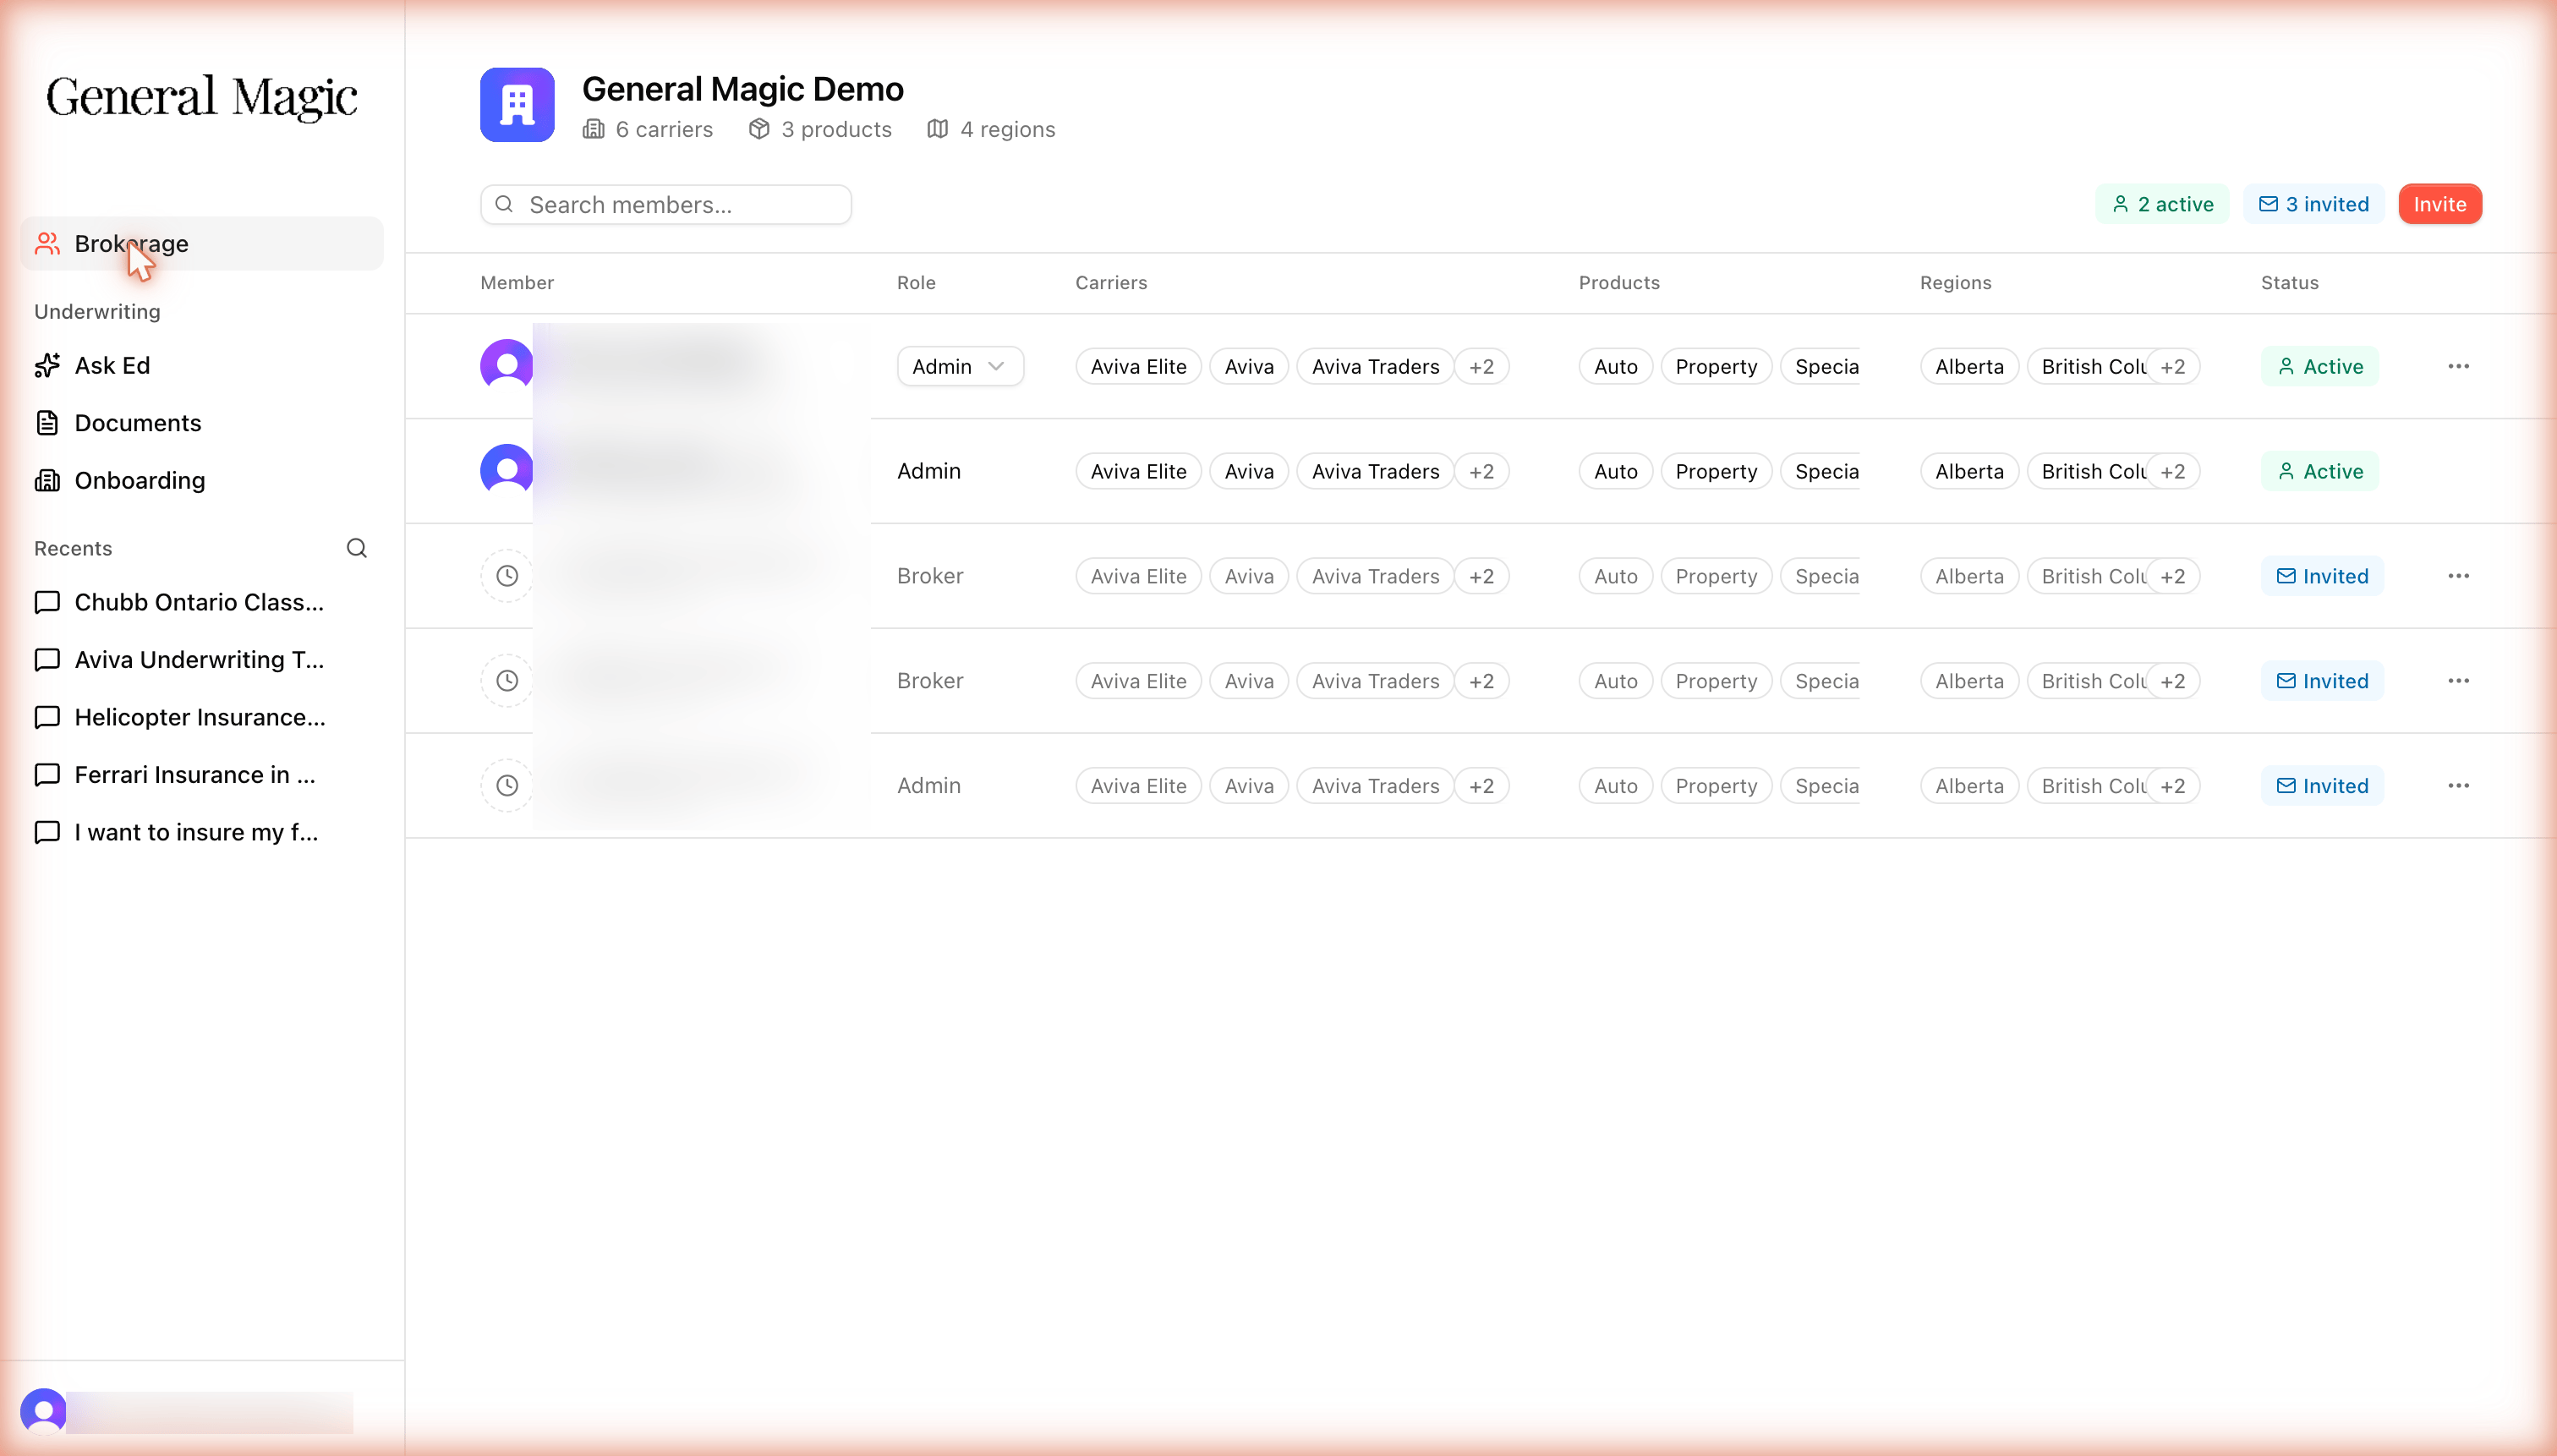
The Brokerage screen lists every member with their role and their carrier, product, and region access. Use Invite to add someone.
Roles
There are two roles in a brokerage workspace:
The first admin account is created for you during setup. You can invite additional people as either brokers or admins.
Inviting a broker
1
Open the Brokerage screen
In the left nav, open Brokerage. You’ll see everyone on your workspace with their role and access, and how many members are active or invited.
2
Invite a member
Click Invite, enter their email address, and choose their role, Admin or Broker. They’ll receive an email link to sign in and set up their account.
3
Set their access
Choose the carriers, products, and regions they can query, plus a default region. New members inherit the brokerage’s tags by default; customize per person as needed.
Assigning access (scopes)
Each broker’s access is defined by three scopes plus a default:- Carriers: which carriers’ documents they can query.
- Products: which lines of business they work with.
- Regions: which regions they operate in.
- Default region: the region Edward assumes when a broker doesn’t specify one. This makes everyday questions faster, because they don’t have to state their region every time.
A broker can only ever see documents that fall within their assigned scopes, plus any general documents you’ve made available to the whole brokerage. Assigning scopes tightly keeps answers relevant and prevents brokers from pulling in carriers or regions they don’t handle.
Next: manage your documents
Keep your underwriting library accurate and current.